UPDATE: Check out this updated shopify tutorial.
This is the first video in my series of tutorials that teach you, how to create your own online store without knowing how to code. In this video I’m diving into Shopify a very popular shop system that is highly customizable and easy to setup.
The best way to follow the tutorial is by signing up for a Shopify trial account, which you can do here.
What you will learn in this tutorial:
– Setting up an account
– Adding products to your store
– How to change the design of your store
– Creating and publishing blog posts
– Adding pages (like FAQs and a Contact Form)
– How to add discounts, coupons and gift cards
– Where you can find your store reports
– And much more

Video Transcript
Hi and welcome to my first video tutorial. This is going to be the first of a series of tutorials that will show you how to build your own startup, without knowing how to code.
In the first tutorial I will show you how to create your own shop using Shopify, this is actually the store that I created before. Just to give you a better idea what your actual store can look like. Up here, we have a slider and we have the products of the week, and more shop information including the newsletter. You can click on each of the individual products and you will receive more information. Here you can see the price just dropped from $40 to $25. This could make it more interesting for a potential customer.
Let’s start by looking at the Shopify main website and sign up for an account. In this case we choose the online store. And we click next. Now we fill in our information. Shopify wants to make sure that they can offer us their best service They ask us a couple of questions. Do you already have products? In this case I’m just “Playing around,” but you would choose whichever option is the right one for you. So what will you sell? “I’m not sure yet” so I just choose that option. And I’m setting up a store for myself so I don’t have to check this box.
After you created an account, you will see this page. This page is the Dashboard. On this Dashboard on the left we see the navigation, which I will talk about later and in the main area they show you 3 steps that you need to take in order to launch your store. So let’s start by looking at the store that we just created. I would do this by opening up a new tab. Right click and open a new link in Chrome you might have a different Browser so it might say something different. But you know best how it works.
This is the web store that we just created. Already looks pretty nice. However, we don’t have any products in here and we probably want to change the design a little bit. Let’s go back to our dashboard.
The first thing we want to do on our Dashboard is to add a product. We click on “add product” and now we choose a title. I’m adding “Red Blouse” and here we can fill in a description… we also want to add the type. In this case the type I would give is “Blouse.” This becomes more interesting, when you have a big store with many different products and many different types. The vendor in this case is myself and I would just add my name. Next we want to choose the price, for the price I’m just going to say it will cost $25. And it is on markdown from $30.
A SKU is typically associated with any purchasable item in the store. For example, the blouse of a particular style and size might have a SKU of some number and the size. For example, the SKU of this item could be 1000-L. 1000 is an arbitrary number that I use as an identifier and L is the size. In this case we also want to charge for taxes and we always require a shipping address to make sure we only ship within the US.
The inventory option allows us to have Shopify track our inventory. The difference is, you could have an infinite amount of copies of your ebook, but if you are selling bracelets you only have a fixed quantity. In this case we have 3 blouses. After we sold those 3 blouses, Shopify will show the product as sold out or not available. This helps us make sure that no one sends us any money if we cannot full-fill the order.
We can also determine, if this product has multiple options/variants. For example, we can offer this blouse in different sizes: large, small
We can always add more options like: color, material and style.
Or we can create a custom option.
The next step is to add one or multiple images. In this case I choose one image that I have already created and saved on my computer.
Next we can add this product to a collection. A collection is a grouping of similar products. For example the collection “Blouses” might hold a red, blue and black blouse. You can think of this like a category. It makes it easy for users to easily navigate your store.
Adding this product to the collection “Frontpage” will add it to the homepage of your store (or the main page).
Now let’s give the product a couple of tags, in this case I want to give it the tag “blouse” and “red”. This again makes it much easier for your customers to search for specific products.
We also want to make sure that search engines can easily find us, therefore we could specify a better title, meta-description and customize the URL of the product. I will touch base on these points in a later tutorial and the given options should be fine for now.
The visibility allows you to choose whether or not you want to show this product right now or at a later point in the future or hide it completely. Save.
And we have just added our first product to our store. So let’s go ahead and add another product. In this case “black blouse”, adding the description, the type and vendor are already filled in.
This product will sell for $20 and it is on sale from $24. And the SKU is 1003-L because I have added other products as well. We want to charge taxes and require the shipping address. We also want to track the inventory; in this case the quantity is 2. We also have multiple options size: “large”, “small”.
Next we want to choose the image and add it to the collection “Frontpage”. The tags are “blouse”, “black”. And leave everything else the same here. You can modify it if you like, but for this tutorial it should be fine. We also want the product to be visible as of now.
Now we are done adding products. We can go back to our Dashboard.
Here we already have a pretty nice preview of how our web store looks currently. But let’s open up the tab or click the image.
I refresh it and there we go! There are three products and still all the other information that we will look at later. Let’s go back to our Dashboard.
There are two more steps to go. The next step is to customize the look and feel of your store.
We have multiple options to do that. Let’s first look at the theme settings. This allows you to edit the design of the store. We could add a custom logo or a custom icon, which will show up here. We can also choose the alignment of the logo, left right or any other place. And now I just want to demonstrate what these options are good for. We can change the background color of our store. We can for example make it red. We don’t want to do that, but let’s try it out anyways. Let’s open it up using the preview button and see what it looks like. Everything is in RED.
I don’t think we like that a lot so we can change the color back to white. Preview one more time. I think it already looks pretty nice. As you can see we can basically change all the colors of our online store. We also have many different fields like the button background and button text color.
The next step is to change the font of our web shop. If we don’t like this font we can change it to something else like “Open Sans” and “Merriweather”. We also have the option to choose an image for the background instead of a color.
You can choose to show a search box and there are many other options that you can enable or disable. E.g. creating a slideshow. I will show this in more detail later. And there are many more features for various different pages. You can try those out on your own.
Let’s move on to something, which I think is really cool. We can download a theme from the Shopify Theme Store and automatically install it on our own store. Let’s try this out!
Open up the link on the left side. And we want to choose only the free designs. Let’s look for something nice. I think I like this one. Let’s click on “Get Theme” in this case I have the URL up here, and I want to copy it. I paste it into this field and now it shows the entire URL of my store. And now we click on Login.
Now it is downloading and installing the theme, which will take a little bit. Now it should be ready.
This is the Theme manager and you can always make some changes to the theme if you don’t like it. If you are an advanced user, you can also change the HTML and CSS of this theme.
Let’s see how it looks like with the new theme in our store. Refreshing the page… It even explains us how we can add images to the slideshow. Next we will do that.
Going back to our Dashboard, we are looking for the slideshow entries under our Theme settings. They should be under homepage. For slide 1, I will choose one of the slideshow images I have already prepared. Next do the same for slide image 2 and slide image 3. This should already be good. Nevertheless, you can add a lot more. Next we want to save it.
Now we can check what our online store will look like. After reloading the page we can see our images. The slideshow is working. Which of these bottom entries do we actually need? I don’t want the blog to be shown on my frontpage and I also want to remove the categories and also this browse area. So how can we remove these?
We go back to our Dashboard -> Themes -> Theme settings
These entries are on the frontpage, so we want to select homepage. The slideshow is working and we are not going to touch this. However, we want to remove the collection list, the blog and we want to remove the browse by disabling it. Save it.
Let’s look again at our online shop and see if the slideshow slides change automatically. Yes, this looks good. And we have also removed all the additional entries on our frontpage.
So let’s go back to the Shopify dashboard and see what we have to do next. Now we are only one step away from our launch.
Next we need to register a custom domain. We do that by choosing “add a domain”. Now we have the option to either choose an existing domain or we can create a new domain/buy a new domain. In this case, we want to buy a new domain. After clicking the button we can register a new domain name. We can use the input field to check the availability of our domain. I will only show you how it works and will not buy a domain, because I already have a different shop. Let’s see if this domain is still available and we want to register it as a new domain name. This domain name is available so now we can go ahead and setup our payment method. After reading the policies and the agreement, we are transferred to the next page where we setup our payment method. I will skip this in this case.
After we bought or added an existing domain, we are ready to launch our store.
We would now select a plan to open our store. I would recommend to choose the basic plan, which is $29 a month, because it gives you a good overview of whether you like Shopify or you want to look for a different solution.
I quickly switched to my other store to show you what happens next. After choosing a plan, you are transferred back to your dashboard, which now looks a little bit different. The area “Ready to Sell” allows you to add additional information, which you need to complete your online store. So you want to make sure to enter your payment method, so that you can collect payments. I have already determined the shipping method and the tax rates. Next you definitely want to remove your store password.
I forgot to explain this to you. Your online store currently has a password, which each customer has to enter in order to see your store. Shopify added this function, because right now you want to make sure that everything is working before anyone can see your store. So when everything is ready you go to this page and scroll to the bottom. I have not picked a plan so in this case I cannot remove the store password.
I just want to explain it one more time… you need to select a plan to remove the password from your online store. Now let’s go back to “Admin” which brings you back to the Dashboard.
Next I’ll give you a quick Dashboard overview. I first minimize this and here is where it becomes really interesting. We can see that today and yesterday we had 0 orders. This is because my store is not live and therefore no one is buying anything. I hope you will have much higher numbers. Let’s next look at the visitors; here you can see how many visitors you had at a given time on your store. For example, I can see that on the 3rd I had 1 visitor at 5pm. Something else are the traffic sources, you can see how many users come directly to your website by entering your stores URL or web address. You can also see how many people were referred to your website. Search engines shows you how many users have found your online shop through Google, Bing, Yahoo etc. The top referrals show you which of these send the most customers to your website.
Here we have a graph of all the sales, which in my case is 0. We can also track the conversions on our website. For example, what is the percentage of people going to the check out page that added an item to their cart and how many people went to the purchase at the end. Also who are my top sellers? Meaning which products are performing best. Down here we determine the payout schedule, when do we want Shopify to send money to our bank account.
Next let’s open up orders from the navigation on the left side. This page gives you an overview of all your orders. I only have an example what this would look like.
– Order identification number
– Time and date it was purchased
– The customer name and if it was paid
– Fulfillment info
– Price
The customer tab allows us to browse through our customers and directly contact individual customers. Basically to make sure everything was to their satisfaction. We can add individual customers or import an excel CSV file.
We have already seen the products tab where you can add and edit products. You can open individual products to edit them. Instead of calling this “black blouse” I can change the title to “blouse noir”. Save.
Next look at collections, these are basically like categories and you can always add additional collections. In this case we only have one, our frontpage.
Under discounts, we can add a coupon code. So we would click on add discount and in this case we want to add the coupon code “SUMMER14”. We can also decide if we want to limit how many times the discount can be used, in this case we limit the coupon to be used no more than 4 times. In this case we want to give a 10% discount on all orders, a specific collection or a single product. E.g. we only want to give a 10% discount on our blue blouse. In this case we want to do that for all orders.
Here we can determine if this discount will expire or not. By default the discount would never expire, but we could also say we want the discount to expire in one week from today. Save.
Here we can see our just created discount code, which has not been used yet. And we can always keep track of it here and even delete it if we like to. Or disable
Under the menu entry gift cards, you can sell gift cards to your customers. However, you can only do this if you have the professional or unlimited plan. So if you want to offer gift cards you need a higher plan then starter plan. These can be really good during Christmas time as an additional source of revenue. This is what it would actually look like in an email.
Under reports we can see all the products which we have sold and we can order those by name, sku or traffic source. This page gives you great insights on where your users actually come from and which type of traffic buys the most products. You also have many more sorting options. E.g. tax rates and traffic sources
I actually want to show you the card analysis, because I think it is a great feature. Here you can get even better insights on your customers. Definitely check out the given examples.
Next let’s create and add a blog post to your online store. By default there is 1 blog post, yours might have a different title, but let’s for now delete this blog post. Click add a blog post and I call this one “Welcome to my blog” and let’s say “Thanks for visiting us”. If you have more users running your store, you can have a different author in my case it is just myself. I post it under the category news and I can again add tags to the posting.
We can again add various search engine options. But I’ll do that in a later tutorial. We want the post to be visible now, and we want to save it.
Let’s go to our website and see what the blog looks like.
Many customers have similar questions; therefore I always like to create a frequently asked questions page. Next I will show you how you can do that.
We want to add the FAQs page. Let me enter a question and directly enter it. Again we have the search engine options, which we don’t touch right now.
To make the page show up we need to add it to our navigation. We want to add it to the links under main menu, in this case “FAQs”. Which is a page and we can specify which one.
We can now check out the new page.
Every store should also have a contacts page. We add another page; in this case “Contact Us” and we leave the text area empty because we want to add the contact form. We choose contacts under the template. And we add it to the navigation. Let’s check it out.
So now if a customer has any questions or feedback, he or she can directly reach out to you and you can make sure the customer is satisfied.
I have 2 more things I want to show you. You have already seen the theme editor. So let’s take a look at the Shopify Apps. These apps are basically new features that other people have programmed and which you can add to your store. Some of them are free and others you have to pay for.
Down here e.g. you can add reviews. But let me show you the appstore, you probably know something similar from your iPhone or android phone. This appstore offers a great variety of apps from different areas like marketing, social media and much more. I will later publish a tutorial, which will show you the best Shopify apps.
Let’s go to the settings page of our store. This page allows you to change the title of your homepage and many other things. There are many new options on the left side, e.g. adding new payment options or changing your shipping options. You can also manage taxes. Another cool feature are the notifications. You can actually change the templates a customer would receive via email. Hi {{name}} would automatically include your customers name in the first row of your email.
Another great feature are the order notifications. By default you will receive an email whenever someone buys something in your store. But you can also add text message notifications. So let’s go ahead and add our phone information. I skip this step, but you would add your information. The Shopify webhooks are for more advanced users, but I might explain them in later tutorials.
Under files, you can upload videos, images etc. that you want to show on your store. You can add those to a page using the page editor. And you would attach a file, basically how you know it from emailing.
The Account page allows you to make changes to your account type. For example you can switch from the starter plan to the professional plan to add additional functions. You can also other store staff and define their roles, you can make them a store admin or just give them permissions to post on your blog.
I hope this gives you pretty good ideas of how Shopify works. I think it is a really good solution and hope you have some fun with it.
If you have any questions or just want to chat, feel free to shoot me an email (you can find my email on my website) or you can follow me on twitter or contact me on Facebook. You can find the links in the description.
Connect with me on-
Google+ https://plus.google.com/+TimOsterbuhr/posts
Twitter https://twitter.com/TimOsterbuhr
Facebook https://www.facebook.com/TimOsterbuhr
p.s. Please feel free to send me a link to your shop. In a later blog post I want to show some Shopify examples and I would love to list your shop (free advertising for you).
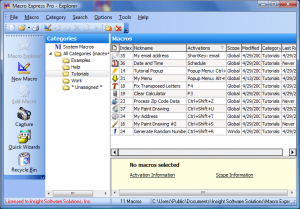 *WTF is a Macro? A macro is a series of instructions, keyboard strokes or mouse actions.*
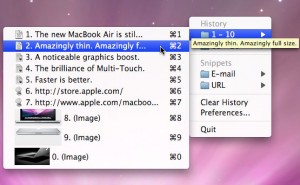 So what is a clipboard manager? A clipboard manager allows you to copy paste more than one thing at a time. Instead of replacing the things you copy, it saves them all into a list. If you want to paste something, it shows you the list and let’s you choose what to paste.
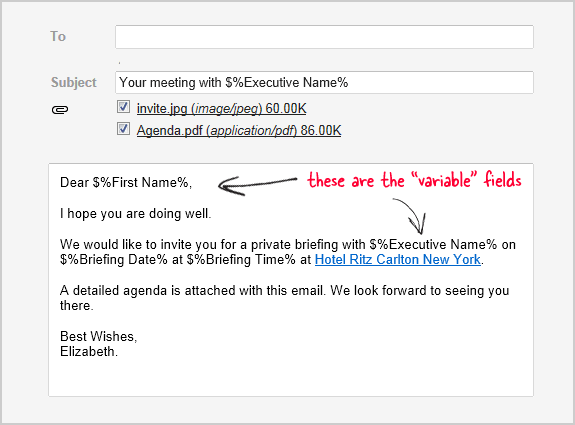
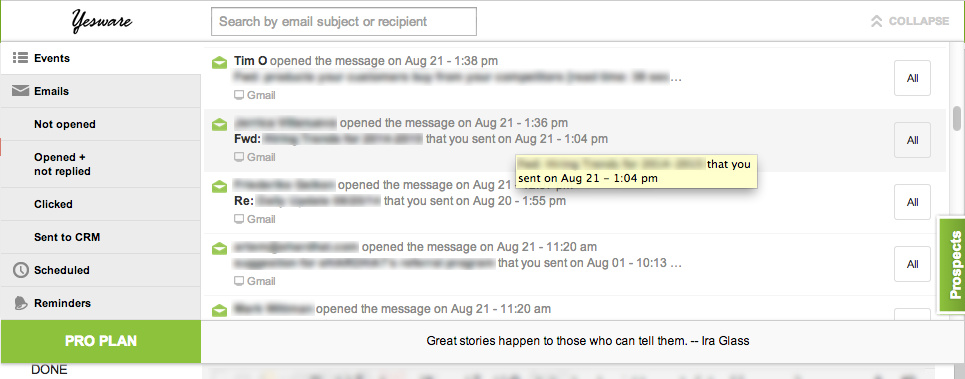
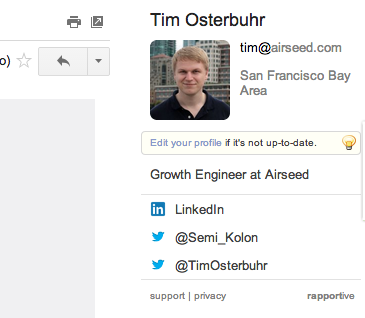 This free browser extension integrates into your Gmail inbox and allows you to find
 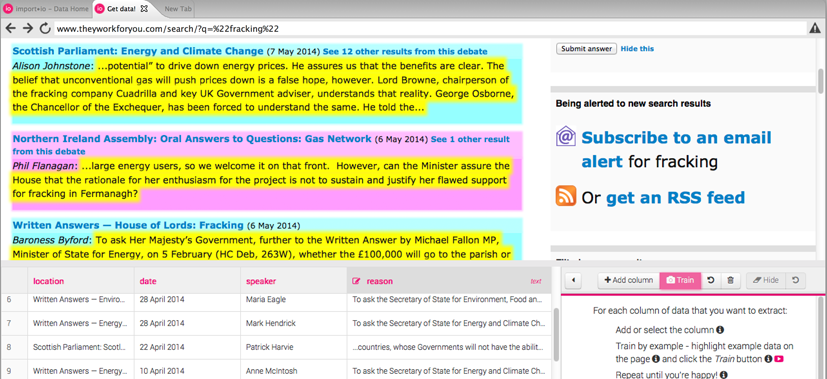 Here are a some ideas that you can use import.io for.
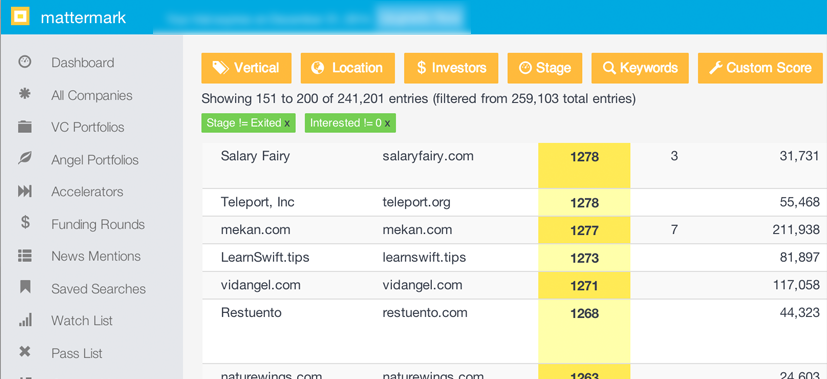 I use the website for lead generation. Mattermark aggregates data from AngelList, Crunchbase,… and spices it up with some interesting stats. Their smallest package let’s you track 100 companies and costs $100 a month. Definitely a good deal to watch your competition and spot trends in your industry.
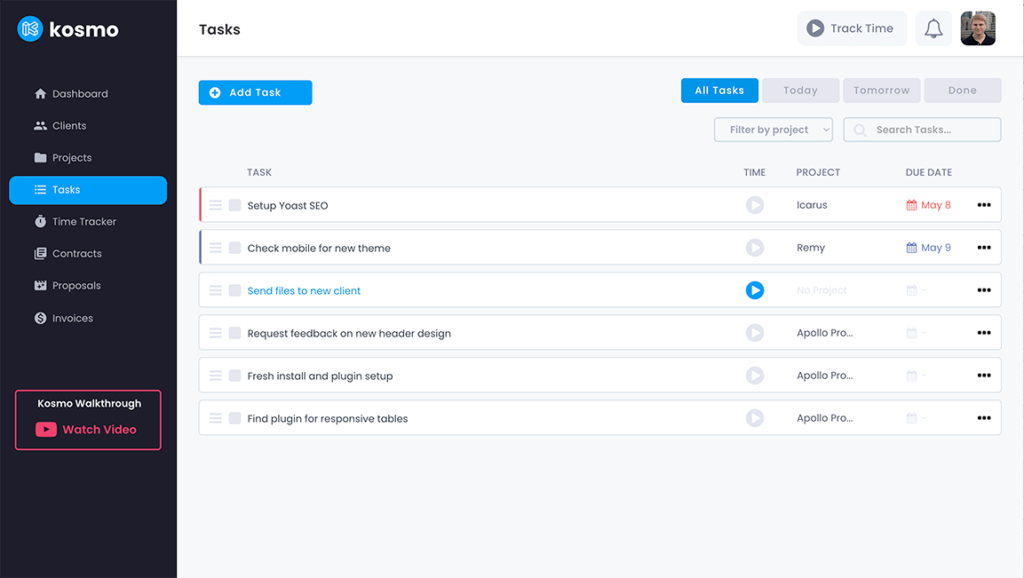
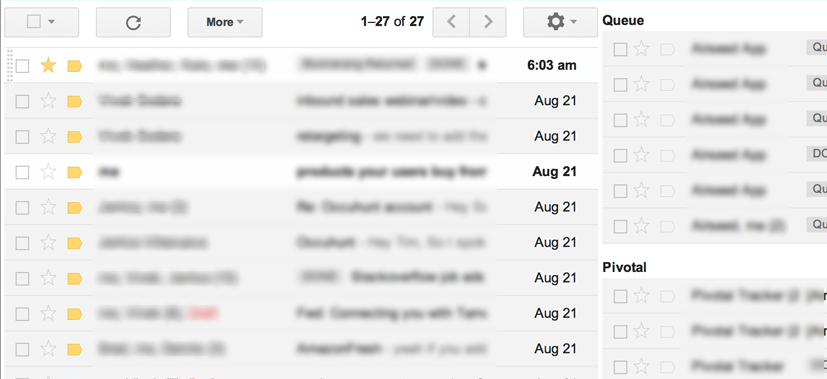 I use it for daily reports from work and tasks on pivotal (another task manager).